
It is very important to provide leaking around the reel body with a gasket in order to protect the inner parts of our reels from dust, saltwater, moisture and mud that may come from the environmental factors. Manufacturers can handle this by using a solid custom-ready o-rings on some high-end reel models, but entry-level or relatively cheap reels do not have this. In addition, since there is no recesses for the seals in these side-plates, it is not possible to obtain and install afterward.
Since the dimensions of each reel bodies are different, oem products are also quite far from us. Since the thickness of the side-plate is also very thin, it will be a very risky process to notch by using very sensitive hand tools and diamond burs for assembling some rubber or silicones. Even the slightest mistake may cause the side-plate to become unusable and cause permanent oil leaks, unwanted stuff like saltwater or sand can easily get in there, even cracks and corrosion may occur.
The damaged areas can be repaired with epoxy kits, sanded and primed again, depending on the area where the damage occurred. Especially since the sealant product is wraps around the body, it passes through areas close to the screws fixing the body, and if such damage occurs in these screw recesses, it will cause cases such as cracking, leaking, corrosion and fading. Moreover, such sensitive equipment and materials are not products that are available in everyone’s home.
Here we will discuss a practical method that anyone can easily obtain and implement, without the possibility of damaging their reel. For this, I will recommend solvent-free and one-component rtv gasket makers, which I have been using for years, tested and which I am very satisfied with, which constantly maintain their elasticity. They are especially preferred because they are easily applicable, resistant to the external environment (UV rays), aging, very high temperatures (600F+) or minus degrees (-80F) and all kinds of acids, oils and chemicals.
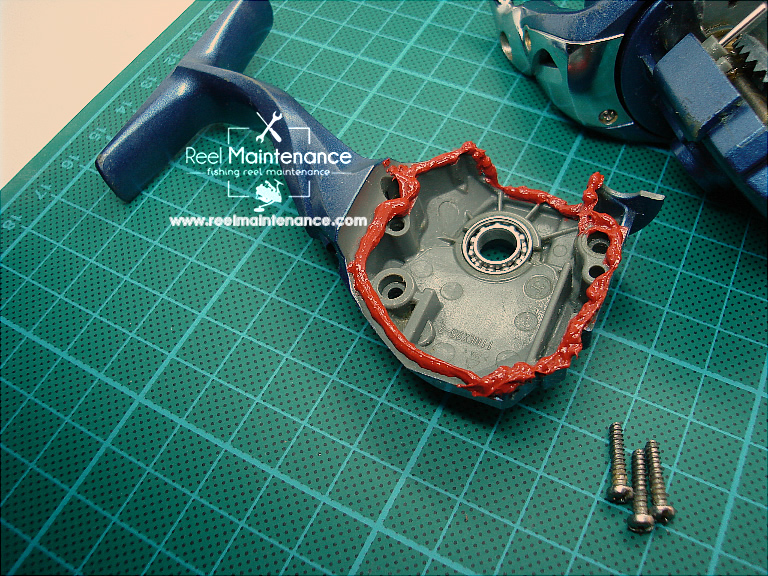
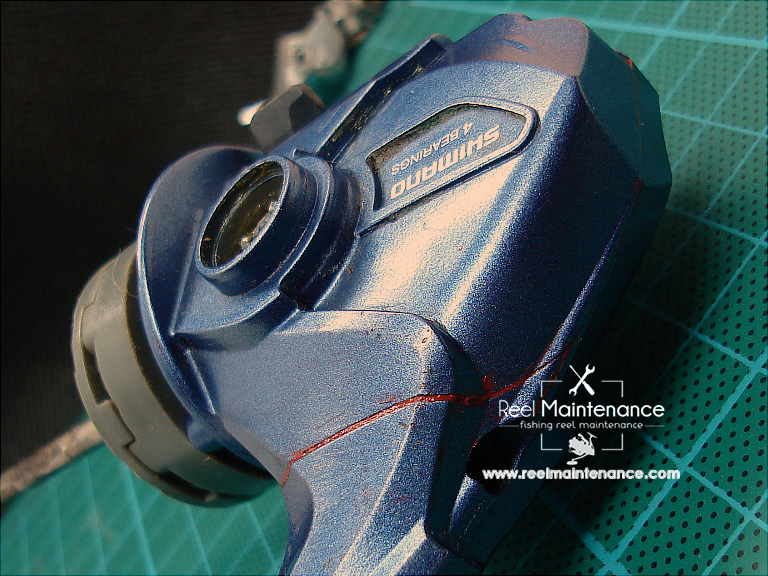
After this gasket maker sealant is applied and the screws of the reel body are tightened, it fills even the most invisible gaps, providing an incredible sealing experience. When looking from the outside, it looks like there is a very thin colored rubber. In this way, you can follow the condition and life of your gasket. They also have various colors. It is important for what purpose you choose the color. If you do not want it to be noticed when looking from the outside, you can choose the same color as the body color it is applied to.
For example, if the color of your reel body is black, you can choose black. However, in order to easily recognize surface degradations, excessive hardening, cracking, crazing, color changes, etc., which are one of the features that indicate that your gasket completes its life time, white or red can be preferred. Thus, the surface structure can be easily seen under the light. Gasket sealant have the feature of sticking to the surface, but they also have the feature of being removed without much effort from where they adhere. However, it is not possible to reuse when disassembled. For example, when you want to change the main gear bearing of your reel, the side-plate must be opened, so when you separate the body into two parts, the gasket becomes unusable. Therefore, the surface must be cleaned and re-applied.
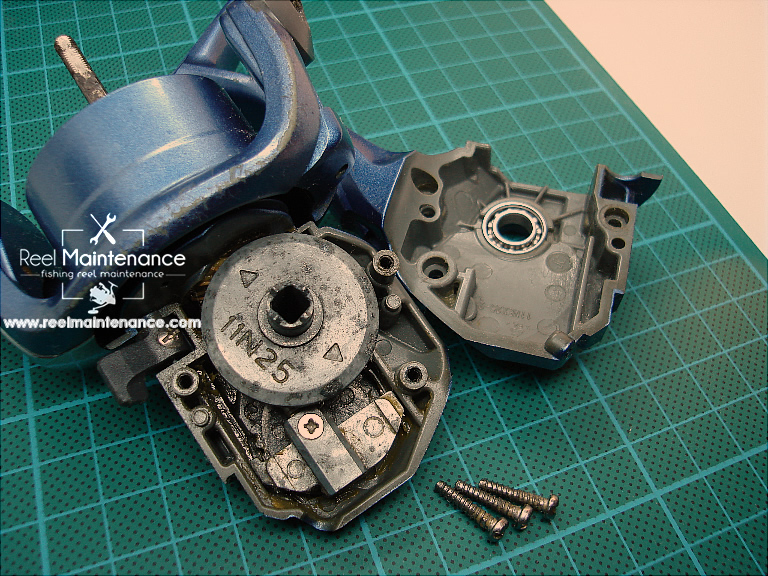
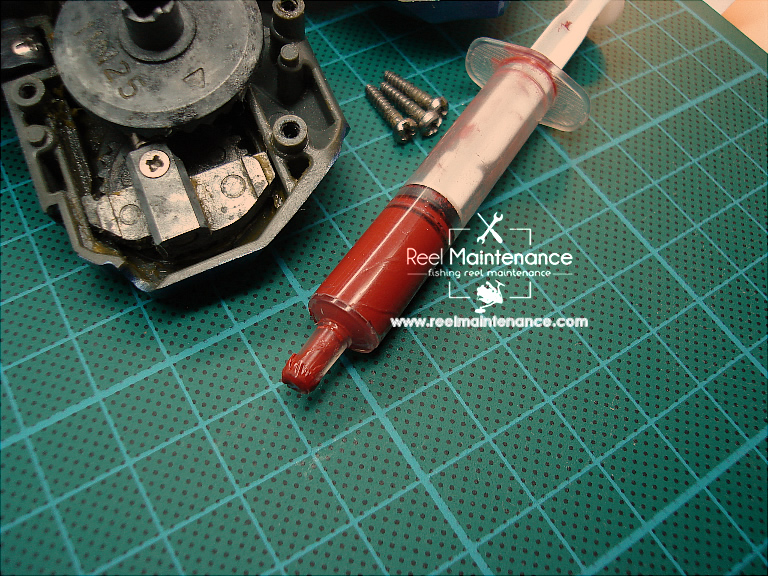
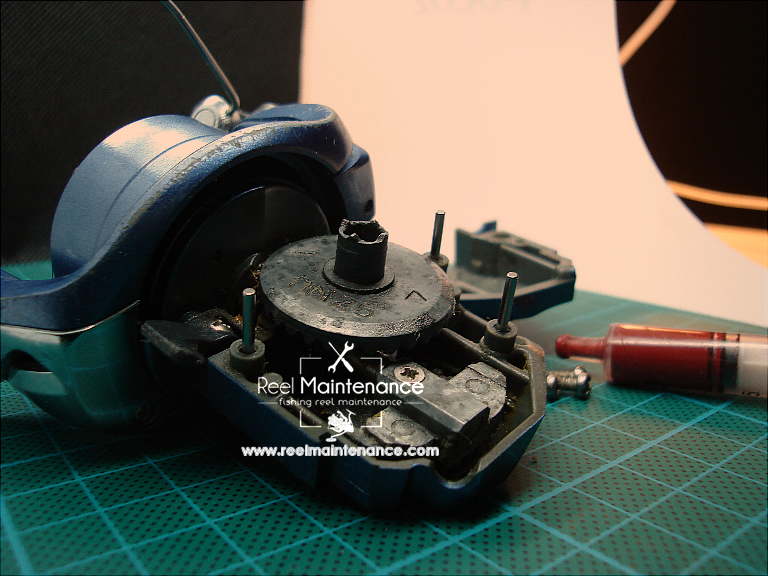
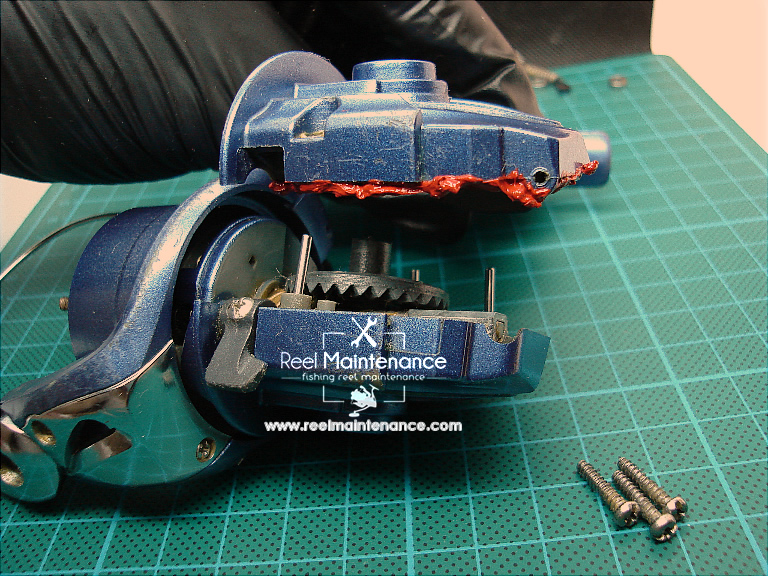
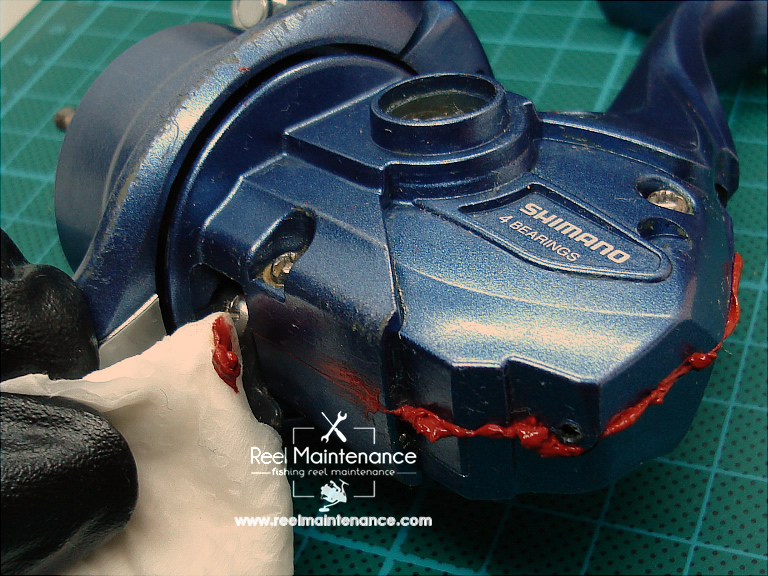
The materials we need to apply the gasket to the reel are a 5ml empty injector (we will not use the needle), and an old wet cloth. We will use the injector to apply the seal in a thin structure. We will use a wet cloth to clean the excess gasket leaking out after closing the body. The surface does not need to be sanded or primed to apply the gasket sealant. It is enough to simply wipe off any grease/oil residues if any. Metal rods are helpful for alignment of side-plate correctly.
How to apply and use gasket maker sealant
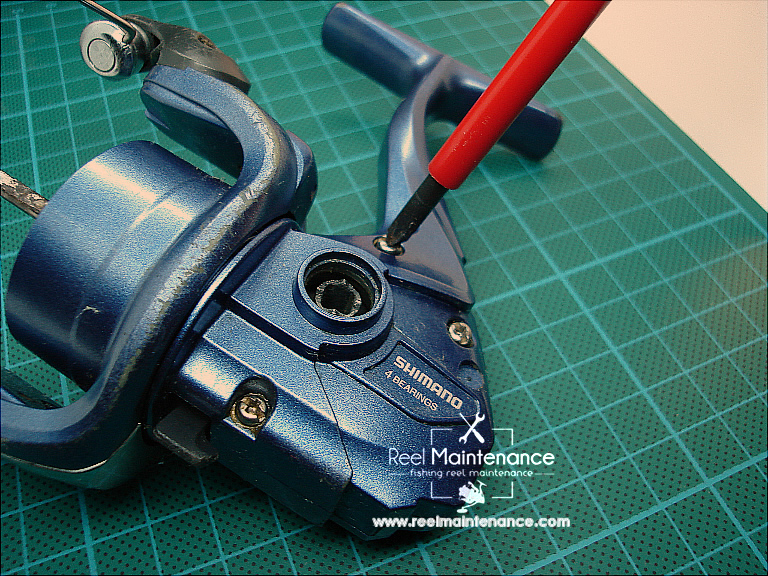
Step 1: Loosen the body screws and clean the side-plate of the edges with a cloth.
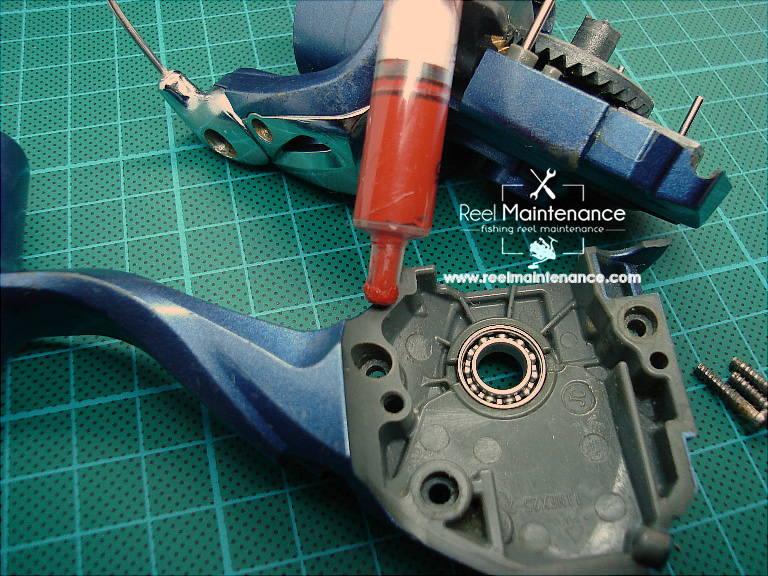
Step 2: Fill the gasket sealant from the tube to half of the injector.
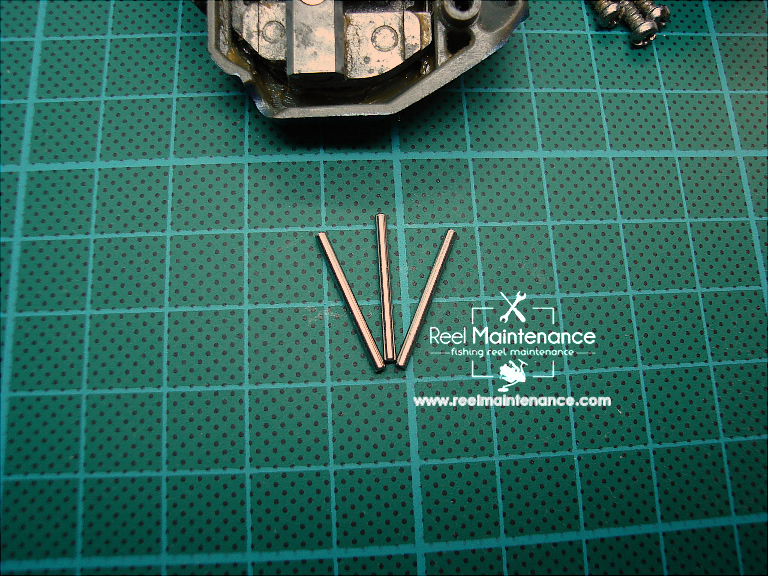
Step 3: Insert the metal rods into the screw holes to correctly alignment both side-plates. The rods allows both plates sitting to gasket correctly and exactly without mistake.
Step 4: Apply the gasket sealant to all side-plate edges. Apply only to one side not both.
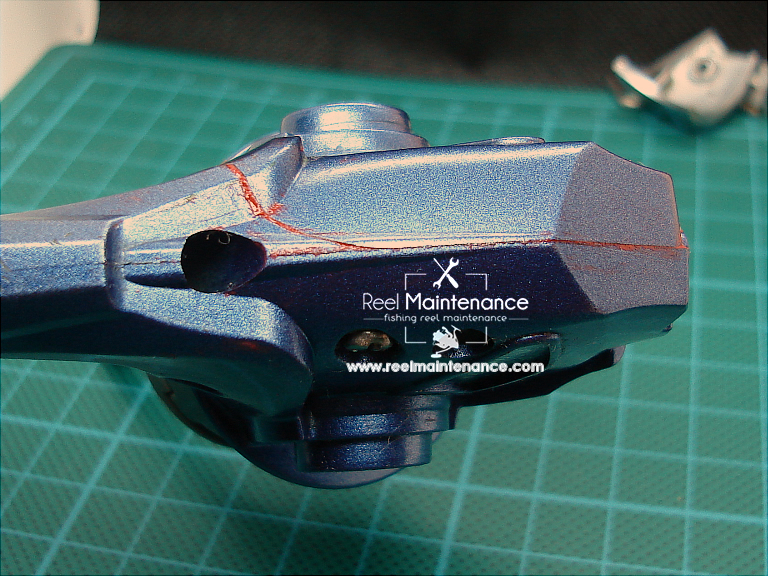
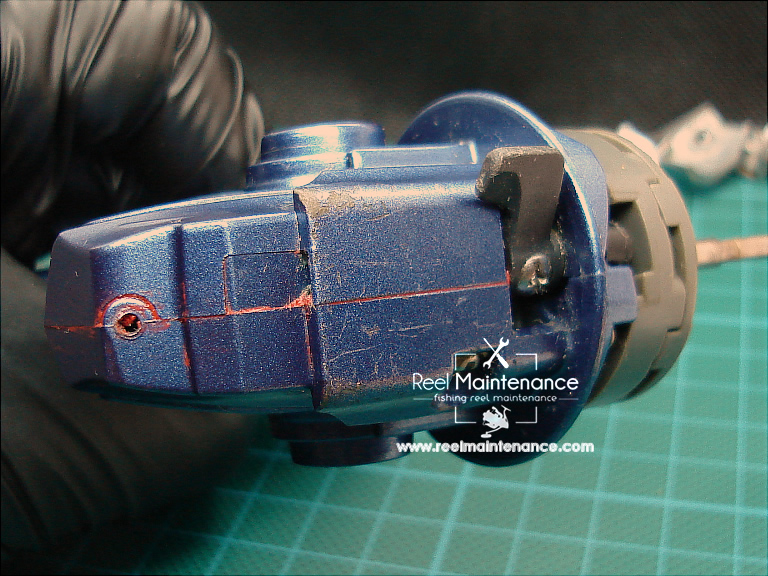
Step 5: Without waiting for the gasket to dry, place the side-plate in a way that aligns them exactly both side.
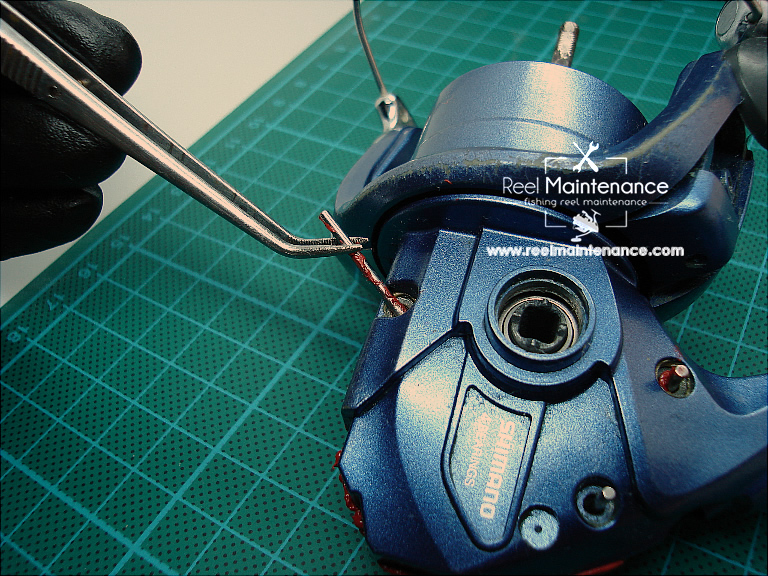
Step 6: Remove the metal rods from the screw holes if placed.
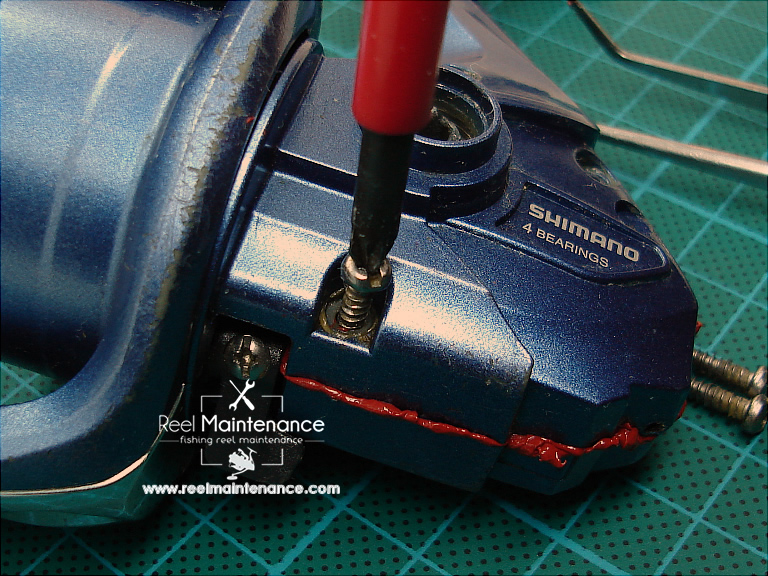
Step 7: Tighten the side-plate screws.

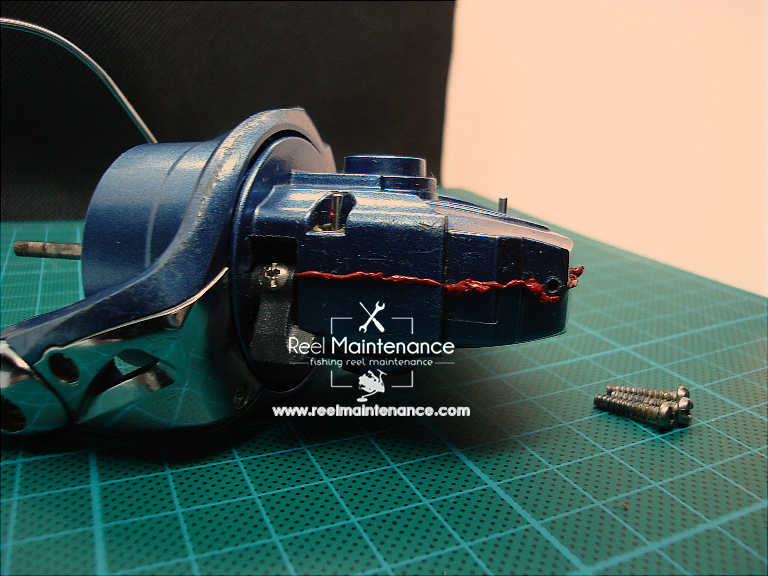
Step 8: Wipe off any excess gasket residues overflowing with a wet cloth. That’s it.
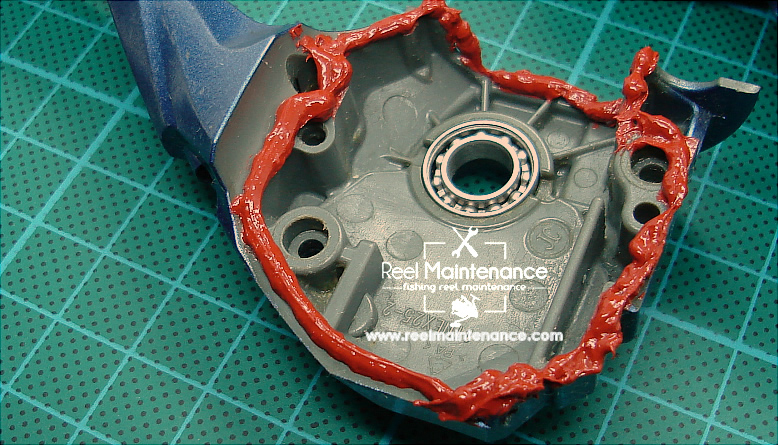
Custom reel gasket results
Looks awesome! The all of gaps between both side-plate was filled with gasket sealant. We improved the waterproofing our entry-level reel for $7.94 US. We used only it in 5ml of injector and we have still more than 90 grams of gasket. This means we can re-gasket our reel at least 17 times!

Permatex and Loctite brands are most popular RTV gasket makers on the market.